

Archive for November, 2022
How To Prep Your Office for a Wall Wrap Installation
Are you considering having a wall wrap installed in your office? If so, it’s important to properly prepare your space in advance to ensure a quick and flawless installation. But what does that entail, exactly?
In this guide, we’ll outline the five steps you need to take to prep your office space for a professional wall wrap. We’ll also discuss what to expect on installation day. So without further ado, let’s get started!
WALL WRAPS FOR OFFICE—HOW TO PREP YOUR SURFACE
When it comes to interior wall murals for corporate offices, there are a few things you can do to prepare your space for a smooth and successful installation.
1. Choose the best location
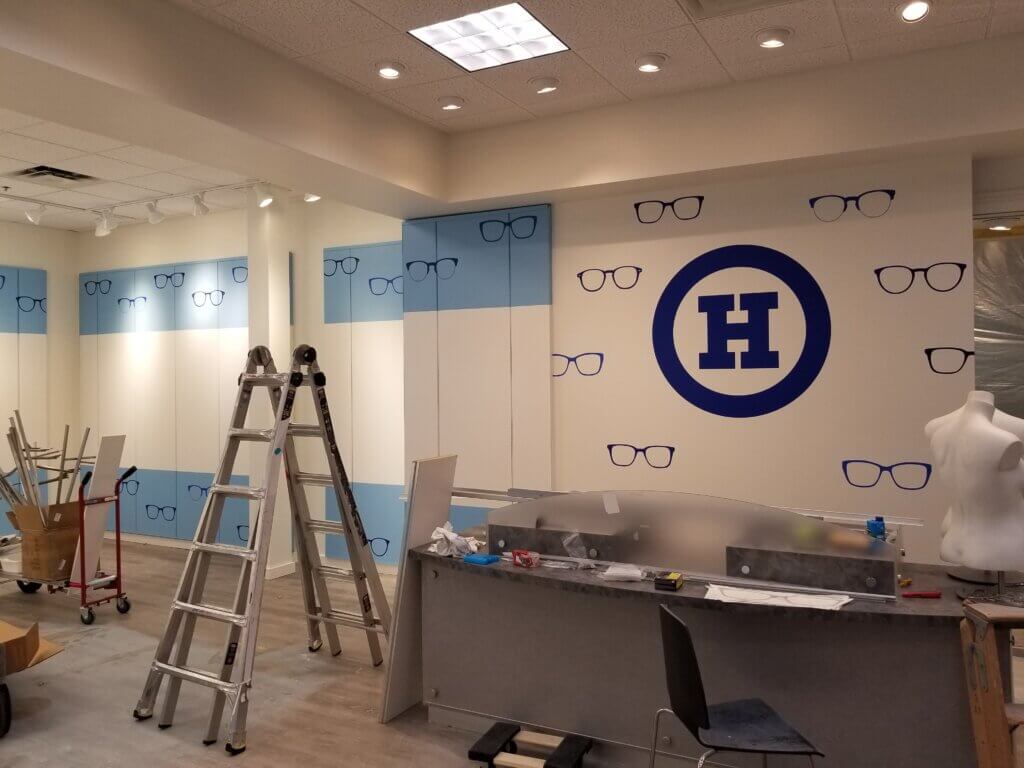
When selecting the perfect spot(s) for your wall graphic, there are several things you should consider. Ideally, the area gets a fair amount of foot traffic and natural lighting, so people can truly appreciate your design. Large, blank walls in lobbies, hallways, break rooms, conference rooms, and other shared spaces tend to make the best choices for wall wraps.
Not every wall surface is ideal for a wall mural, unfortunately. Surfaces to avoid include:
- Areas with high humidity
- Areas near heaters
- Surfaces with water pipes
- Walls with large cracks, peeling paint, or other damage
2. Move any obstructing furniture or fixtures
If there are any pieces of large furniture (e.g., couches, cabinets, desks, etc.) or other objects blocking access to the surface you’ve chosen for your wall wrap, be sure to move them out of the way prior to the installation team’s arrival. This will save a lot of time and give the installer unobstructed access to the entire area.
Any fixtures that can be easily removed without causing damage to the walls is also helpful, but not mandatory. Any pipes, trim, or other permanent obstructions should NOT be touched, but do mention them to the installer ahead of time so they can plan around them.

3. Fill in any cracks or holes
It’s important to have a smooth and even surface if you want your wall wrap to last. So, if you notice any small holes or cracks, make sure to fill them in with spackle or joint compound at least 24 hours prior to the installation team’s arrival. Once the filler is dry, sand it down until the surface is nice and smooth, and then clean the area of any debris (more on this later).
4. Prime and paint the wall (if necessary)
If you’re starting with a new wall that hasn’t been painted yet, now’s the time to prime it! This will help your wall wrap adhere better and last longer. Just make sure to use a primer that’s specifically designed for vinyl wall wraps—oil-based primers should be avoided, as they can damage the vinyl over time.
While the surface does not need to be painted before installation, keep in mind that wall wraps can be removed more easily from painted surfaces than non-painted ones. Newly painted walls should be left to dry for at least a week before the wall graphic installation.
If you think you might want to remove the wrap at some point down the road, painting the wall first is recommended. It’s a lot easier to paint an entire wall when it’s empty rather than trying to paint around your wall wrap later.
5. Clean the surface
Once you’ve taken care of any repairs and/or painting, it’s time to give the entire surface a good cleaning. Even if your walls look clean, there could be unseen dirt, dust, or other debris that will interfere with the adhesive’s hold on the back of the wall wrap.
To avoid this issue, it’s best to give the surface(s) a good cleaning before installation day. You can do this yourself with a mild isopropyl alcohol and water solution and a clean rag—or hire a professional cleaning service to do it for you.
WHAT TO EXPECT ON INSTALLATION DAY
Now that you’ve prepped your office space and chosen the perfect location(s) for your wall mural, it’s time to sit back and relax—the hard part is over!
On installation day, a team of professional installers will arrive to take care of everything. They’ll start by surveying the area and making sure all the furniture and fixtures have been moved out of the way and everything is ready for the wall wrap installation to begin.
If you have any questions or concerns, it’s best to notify the team prior to their arrival. While we certainly encourage you to ask questions as they arise, this will save time and help avoid any unwanted surprises.
Are you still working on your design? If so, check out our 5 pro tips for effective commercial wall wrap design.
TAKE YOUR BRAND TO NEW HEIGHTS WITH BRAND INK
Even an award-winning recipe can be ruined by an inexperienced chef. If you’ve spent the time and energy to create the perfect wall wrap for your office—don’t throw it all away by hiring the cheapest installer in town.
Whether you’re looking to breathe life into a new brand or take your growing business to the next level, our team of professional designers, manufacturers, and installers has the expertise and experience to get the job done right—the first time. With our in-house design, quick turnarounds, and 3M-certified quality, wrapping your workspace with Brand Ink is the best way to elevate your brand in the eyes of your customers.
Contact us today to request a FREE wall wrap quote for your business.
How to Install Vinyl Decals on Windows [VIDEO]
Are you looking to increase the face value of your storefront or office space? Whether you want to update your business hours or show off your new logo, applying vinyl decals on your windows and doors is a great way to visually enhance the entire façade of your building.
But if you’ve never done it before, you might be asking yourself, “How do I install large window decals by myself?”
The good news is—with the right tools, materials, and guidance—you too can apply a large vinyl decal on your glass surface with ease. Before you get started, though, it’s important you have everything you’ll need at the ready.
WHAT YOU NEED TO INSTALL A DECAL ON A WINDOW
Fortunately, there isn’t much you need to install a window decal. Just be sure to equip yourself with the following items before you begin:
- Window cleaning spray
- If you’re looking to save a few bucks, you can make your own solution in an empty spray bottle using a mixture of 70% isopropyl alcohol and 30% water.
- A clean microfiber cloth
- Do NOT use a standard towel as this can leave behind fibers.
- Your window graphic
- For the best quality, be sure to get them printed by a reputable brand signage expert in your area!
- Masking tape
- If you don’t have masking tape, blue painter’s tape or any other tape that won’t leave behind a sticky residue will work.
- A vinyl wrap film cutter
- You can also use a standard utility knife or razor blade, but if you do, be extra careful not to cut too deep and scratch the glass.
- A plastic squeegee tool
- A credit card (or another hard, flat object) can also be used.
HOW TO INSTALL WINDOW DECALS
Thanks to today’s high-quality film, even a complete beginner can transform their storefront in no time. Check out the video below or keep reading for our simple 5-step guide on how to install vinyl decals on windows like a pro.
STEP 1: CLEAN THE WINDOW
Before you begin your window decal installation, the first thing you need to do is thoroughly clean the glass surface. You don’t necessarily need to clean the entire door or window—just the area you intend to affix the decal.
NOTE: Even if the glass appears clean to the naked eye, we recommend you clean it anyway because even a small amount of dust or sediment can affect the hold of the adhesive and lead to premature peeling.
Spray the glass with your cleaning solution until the entire area has been covered. Then wipe down the area with your microfiber cloth. Once the surface is visibly clean and dry, you can move on to the next step.
STEP 2: DRY MOCK YOUR DECAL
Now that the glass is clean, take your window graphic and attach a piece of masking tape on both sides of the center of the backing paper. If you’re installing a large window decal, you may want to use additional pieces of tape to ensure it will stay on the surface without falling off.
Place your decal where you would like it on the glass and press on the tape. Then take a step back and check to see if that’s exactly where you want it. If your placement is off or it looks a bit crooked, go back and adjust the tape until it looks right.
NOTE: If you don’t feel comfortable eyeballing it, you can use a tape measure and level to ensure it’s precisely positioned.
STEP 3: BEGIN REMOVING THE LINER PAPER
Once you have your window decal positioned exactly where you want it, you can begin peeling off the top of the paper liner. You’ll want to remove about one squeegee length (3–5 inches or so) of the backing at a time.
Now grab your vinyl wrap film cutter and carefully cut off the top section of the liner. After the top of the paper is removed, tack the top two corners onto the glass.
STEP 4: PRESS ON THE DECAL
Now grab your squeegee and press the decal firmly onto the glass. Use smooth, side-to-side motions, making sure you’re pushing your ear outwards as you do. Keep repeating this motion until all visible bubbles have been removed.
Now that the top section of the decal is securely affixed, you can remove the pieces of tape. Grab the bottom of the decal and hold it away from the glass. Reach under and slowly peel off another few inches of liner paper. If it’s a smaller decal and you’re comfortable enough, you can remove the entire liner. Just be careful not to let go of the bottom of the decal!
Now use your squeegee to press down on this section of the decal as you did before. Then repeat these steps until all of the liner paper has been removed and the entire decal is applied to the glass. Give it a full top-to-bottom swipe with your squeegee to ensure no spots have been missed.
STEP 5: SLOWLY PEEL OFF THE PRE-MASK
Choose one of the top corners and carefully peel back a small section of the “pre-mask” backing. Once you have a good hold, use both hands to keep slowly peeling it off against the window and at an angle.
NOTE: Do NOT pull the pre-mask backing straight away from the window at any point. Instead, pull it in parallel with the glass surface.
As you peel, look up and down the line to make sure nothing is coming off. If you see any lifting of the graphics, immediately stop and reapply it with the squeegee.
Once the pre-mask is completely off, give the entire decal one final swipe with the squeegee and remove any excess residue that may be left behind on the glass.
Congratulations—your window decal has been successfully applied! If you have any additional decals to install, go ahead and repeat the steps above until the entire job is complete.

LET BRAND INK BE YOUR WINDOW DECAL INSTALLATION EXPERTS
Too busy running your business to deal with signage installation? Let our national network of installers do the work for you so you can focus on what you do best.
At Brand Ink, we offer custom decal design, printing, and installation services. Whether it’s a small door decal or a full window graphic, our team is ready to apply your brand signage quickly, professionally, and outstandingly. Contact us today for a FREE quote.